
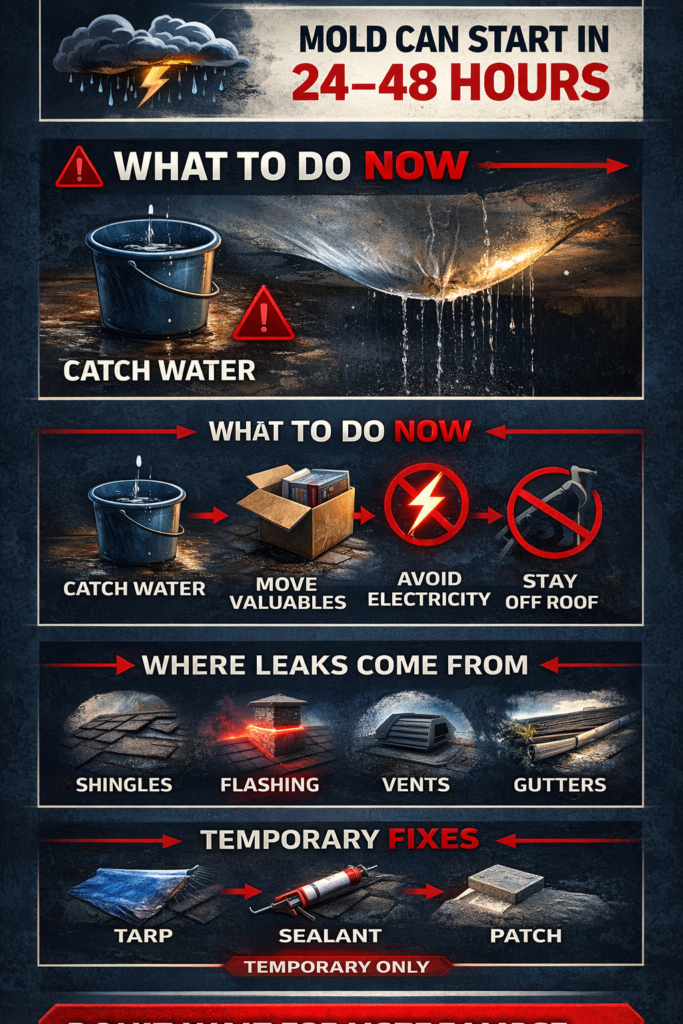
- Stay safe first: Never climb onto a wet roof during a storm
- Immediate action: Contain water indoors, protect belongings, shut off affected circuits safely
- Find the source: Check attic, look for damaged shingles, failed flashing, blocked gutters
- Temporary fix: Use tarps as short-term protection only (not a permanent solution)
- Permanent solution: Professional inspection + proper repairs to fix the actual cause
- Time-sensitive: Dry wet materials within 24-48 hours to prevent mold growth
- A roof leak during heavy rain should be treated like an emergency because moisture left in place can lead to mold fast, often within 24 to 48 hours if materials stay wet.
- Your first job is not fixing the roof from the outside. Your first job is protecting people, containing water indoors, and staying away from wet electrical areas.
- The drip you see inside is not always the true entry point. Water can move through roof layers, framing, and attic materials before it appears on a ceiling.
- Temporary protection matters. A tarp can reduce further damage, but it is only a short-term measure and should not replace real repairs.
- Insurance may help with sudden storm-related damage, but homeowners policies are not maintenance contracts and gradual wear is often your responsibility.
- The best long-term solution is a full inspection that checks shingles, flashing, vents, valleys, drainage, and hidden moisture, then repairs the real cause instead of just the visible drip.
Introduction
A leaking roof in heavy rain is one of those home problems that feels small for about five minutes, and then suddenly feels serious. What starts as a stain or slow drip can quickly become soaked insulation, damaged drywall, ruined flooring, electrical risk, and a mold problem if the area stays wet. The EPA says that if wet or damp materials are dried within 24 to 48 hours, mold usually does not grow, which is exactly why fast action matters so much.
Heavy downpours also reveal weaknesses that lighter rain may not. Roof systems are designed to shed water, and steep slope asphalt shingle roofs rely on gravity and roof slope to drain properly. Flashing is what protects vulnerable joints around chimneys, skylights, vents, and walls. When those details fail, intense rain exposes the problem faster. Keep reading to learn what to do right away, how to find the source, and what will actually stop the leak for good.
Immediate Emergency Actions While It Is Still Raining
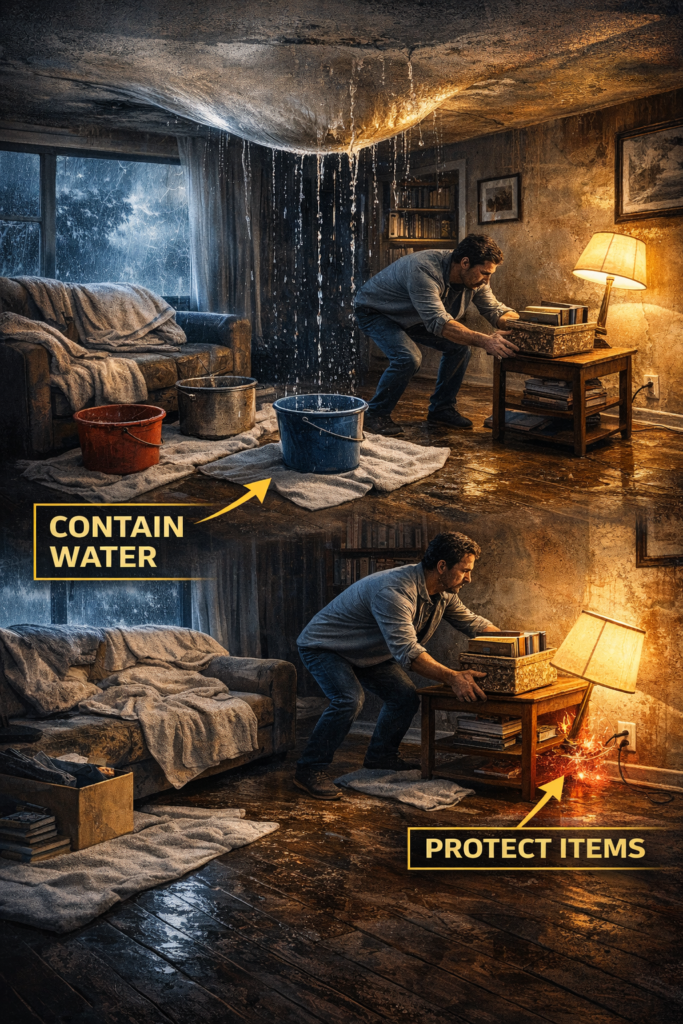
Stay inside and focus on damage control. Place containers under active drips, spread towels to catch splash, and move people away from the affected area. If water is near light fixtures, ceiling fans, outlets, or switches, do not touch wet electrical equipment. It is advised to turn off electricity if it is safe to do so, and careful handling of wet appliances or electrical items that have been in water.
Interior Damage Control
The smartest way to handle a leak indoors is to slow the spread before you worry about cosmetics. A quick response can save your ceiling, flooring, furniture, and even your insurance claim.
Catching and Containing Water
Start by using buckets, bins, or any deep container you have. Place a towel inside the bucket if the drip is splashing everywhere. If the leak is spreading across the ceiling, use more than one container instead of waiting for one spot to overflow.
Try to protect the floor too. Towels, old sheets, or plastic can stop water from bouncing outward and damaging nearby surfaces. This step looks basic, but it makes cleanup much easier later.
Protecting Your Belongings
Move electronics, lamps, rugs, furniture, paperwork, and anything valuable out of the wet zone. If you cannot move large furniture, cover it with plastic sheeting and lift fabric items off the floor if possible. The goal is not perfection. The goal is reducing how much of your home gets involved in the leak.
Electrical Safety
If water is close to fixtures, outlets, or wiring, shut off the affected circuit only if you can do it safely without stepping into water or touching wet surfaces. Never use a wet hand on a breaker panel, and never assume a damp light fixture is harmless. Do not touch electrical equipment if it is wet or if you are standing in water. Call an electrician if water has reached wiring, breakers, recessed lights, or any ceiling fixture. That is not an area to guess with.
Handling Bulging Ceilings
A bulging ceiling usually means water is pooling above the drywall. That puts weight on the ceiling material and raises the risk of a sudden collapse. If the bulge is large, the ceiling is cracking, or water is near electrical fixtures, clear the area underneath right away.
In some cases, homeowners create a small controlled drain hole at the lowest point of the bubble with a bucket underneath to relieve pressure. Only do that if the area is free from electrical danger and the ceiling looks stable enough to approach. If you are unsure, step back and call a professional. A damaged ceiling is cheaper than an injury.
Finding the Leak Source

Finding the source takes patience because roof leaks rarely behave in a straight line. You are tracing the path of water, not just the place where it becomes visible.
Understanding Water Travel Patterns
The spot where water drips indoors is often not directly below the roof opening. Water can move along roof decking, rafters, framing, and insulation before it finally finds a place to show itself. That is why you have to think uphill and outward from the visible stain. This is also why heavy rain can feel confusing. The leak may seem random, but it is usually following the path of least resistance.
Attic Inspection Techniques
If you can access the attic safely, take a flashlight and look for wet insulation, water trails on rafters, dark stains, rusted nails, and damp roof decking. It is recommended to inspect rafters and insulation in the attic for water stains and discoloration. You may also notice tiny points of daylight, especially around penetrations or damaged areas. If light is getting in where it should not, water often can too.
Interior Ceiling Inspection
Inside the home, look for brown or yellow stains, peeling paint, bubbling drywall tape, soft spots, or cracked ceiling texture. These clues do not always reveal the exact source, but they help you map where water has traveled.
Common Causes of Roof Leaks in Heavy Rain

Heavy rain does not create roof defects out of nowhere. It usually exposes a weakness that already exists.
Damaged or Missing Shingles
Cracked, curled, torn, or missing shingles leave the roof more vulnerable, especially in strong rain and wind. Since asphalt shingle systems are water shedding systems, damage that interrupts the normal flow of water can quickly lead to leaks. Regular roof inspections can catch these issues early.
Flashing Failures
Flashing protects the joints where the roof meets walls, chimneys, skylights, vents, and other penetrations. Flashing prevents water entry at these intersections, which is why flashing failure is one of the most common and most important causes to check.
Roof Penetration Problems
Pipe boots, vent caps, exhaust outlets, satellite dish mounts, and HVAC penetrations can all leak when seals crack or fasteners loosen. These spots are small, but they fail often because they interrupt the roof surface.
Gutter and Drainage Issues
Blocked gutters and roof drainage problems can force water backward under roofing materials or make it sit where it should drain away. The EPA specifically recommends cleaning and repairing roof gutters regularly as part of moisture control.
Debris Accumulation
Leaves, twigs, and dirt hold moisture against the roof and block the normal path of runoff. In valleys and around penetrations, that extra moisture can turn a weak spot into an active leak.
Installation Errors on New Roofs
A newer roof can still leak if shingles were rushed, flashing was installed badly, penetrations were sealed poorly, or critical details were missed. Age is not the only reason roofs fail. Bad workmanship can show up early, especially during hard rain.
Manufacturing Defects
Sometimes the problem is the material itself. A defective shingle, underlayment issue, or failed accessory part may qualify for warranty replacement, but you still have to identify it as the cause.
Temporary vs. Permanent Roof Repairs

| Repair Type | When to Use | Duration | Limitations |
|---|---|---|---|
| Roof Tarp | Emergency storm damage | 30 days maximum | Wind can tear it, not waterproof long-term |
| Roofing Cement | Small cracks, emergency patch | Few weeks to months | Cracks in heat/cold, not structural |
| Caulk/Sealant | Penetration seals, flashing gaps | 1-3 years | Not a substitute for proper flashing |
| Shingle Replacement | Localized damage, good roof | Permanent | Matching color may be difficult |
| Flashing Replacement | Chimney, skylight, wall leaks | Permanent | Requires skilled installation |
| Full Roof Replacement | Widespread damage, old roof | 20-50+ years | Highest upfront cost |
Emergency Roof Tarping
If the storm has passed and you need to protect the roof until repairs can be made, tarping is a common short-term solution. However, it should only be done safely and with proper precautions.
When to Call for Professional Tarping
- Steep roof pitch (safety concern)
- Large damaged area requiring multiple tarps
- Wet or icy conditions
- Multi-story building or high roof
- Structural damage or unstable roof decking
Insurance Considerations
Understanding your insurance coverage can make a major difference in how you handle a roof leak. NAIC says homeowners policies in most states generally cover damage caused by windstorm and hail, but gradual wear and maintenance-related leaks are a different matter and may not be covered the same way.
What Insurance Typically Covers
- Sudden storm damage: Wind-driven rain, hail damage, fallen tree limbs
- Interior water damage: Ceiling, walls, flooring affected by covered roof leak
- Emergency repairs: Tarping, temporary protection to prevent further damage
- Replacement costs: Depends on policy type (Actual Cash Value vs. Replacement Cost Value)
What Insurance Typically Does NOT Cover
- Wear and tear: Old shingles, aging materials, gradual deterioration
- Maintenance issues: Clogged gutters, missing shingles you didn’t replace
- Poor workmanship: Installation defects, contractor errors
- Neglect: Damage that worsened because you delayed repairs
Documenting Damage for Insurance Claims
Proper documentation is essential for a successful insurance claim:
- Take photos and videos: Interior damage, exterior roof damage, wet areas, stains
- Note the date and time: When did the storm occur? When did you discover the leak?
- Keep receipts: Emergency repairs, tarping, temporary fixes, cleanup costs
- Get professional inspection: A certified roof inspector’s report adds credibility to your claim
- Report promptly: Most policies require timely notification after discovering damage
When to File a Claim
If the damage is minor and below your deductible, paying out of pocket may make more sense. If the damage is larger, hidden, or likely to exceed your deductible, it may be worth filing a claim and getting a contractor inspection because not all damage is immediately visible.
When the adjuster comes, be ready with photos, notes, receipts, and a clear explanation of what happened. The adjuster will inspect the damage, review coverage, and determine what deductible or limits apply.
When to Call a Professional
Call a roofer right away if the leak is severe, you have multiple leak points, the ceiling is sagging, water is near electrical systems, or you cannot safely inspect the attic. Also call a professional if the leak keeps returning even after a patch.
A trained roofer can see problems you may miss, especially failed flashing, subtle shingle damage, hidden moisture, poor drainage, or penetration issues that are not obvious from inside the home.
Professional Roof Inspection
A strong inspection looks at the roof surface, flashing, penetrations, valleys, drainage paths, attic condition, wet insulation, and visible interior damage. NRCA inspection guidance highlights roof surface condition, flashings, building-related leak sources, drainage, and slope as key factors in evaluating a roof.
Ask for clear photos, a written explanation of the cause, and a repair plan that fixes the source instead of just the symptom. If the damage is significant, getting more than one estimate is smart. Our comprehensive roof inspection checklist can help you understand what to expect.
Long-Term Repairs and Solutions

Once the rain stops and the immediate danger is under control, the focus should shift to fixing the actual cause of the leak. A proper long-term repair helps prevent repeat damage, protects the structure of the home, and saves money over time.
Permanent Shingle Replacement
Replace damaged shingles when the issue is isolated and the surrounding roof is still in good shape. Matching color and style matters, but correct installation matters even more.
Flashing Repairs and Replacement
If flashing is loose, rusted, cracked, or missing, replacing it properly is often the real solution. Roof leaks around chimneys, skylights, and walls frequently come back when people only use sealant and skip the flashing repair.
Vent and Boot Replacement
Old pipe boots and worn vent caps are common culprits. Replacing these parts is often straightforward and can solve leaks that show up only during hard rain.
Valley Repair
Roof valleys collect a lot of runoff, so even a small defect there matters. Keep valleys clear and repair any damaged metal or underlayment in that channel.
Full Roof Replacement
Sometimes repair is not enough. If the roof is old, repairs are scattered everywhere, or moisture damage is widespread, a full replacement may be the smarter investment. That is especially true when repeated patches are costing more than they are saving.
Preventive Maintenance to Avoid Future Leaks
The best way to deal with a roof leak is to lower the chances of facing one again. Regular maintenance helps catch small warning signs early, improves drainage, and keeps your roof in better condition through every season.
Regular Inspection Schedule
Check your roof seasonally and after major storms. A yearly professional inspection is also a good idea, especially for older roofs or homes with chimneys, skylights, or lots of penetrations. Learn more about how often your roof should be inspected.
Gutter Maintenance
Keep gutters and downspouts clean, flowing, and firmly attached. It is recommended to clean and repair gutters regularly as part of moisture prevention.
Debris Removal
Clear valleys, remove leaves, and trim branches that drop debris or scrape shingles. A cleaner roof dries faster and sheds water more effectively.
Shingle Maintenance
Replace damaged shingles early. Small cracks and lifted tabs often look harmless until a heavy storm pushes water through them.
Sealant and Flashing Checks
Check caulking and flashing every year. Look for cracked sealant, rust, gaps, or loose edges around penetrations and transitions. These are the small failures that often turn into major leaks.
DIY vs. Professional Repair
Do-it-yourself fixes make sense when you are working inside the home, containing water, drying wet areas, or applying a very limited temporary patch that you can reach safely. They do not make sense when the roof is wet, steep, unstable, or electrically risky.
If you are guessing at the source, climbing in bad weather, or relying on sealant as your main repair plan, it is time to stop and call a roofer. Professional repairs also come with better workmanship accountability and often with warranty protection.
Need Professional Roof Leak Assessment?
Get expert help identifying and fixing the real source of your roof leak
Call 516-631-1480
Contact Us Online
Conclusion
Stopping a roof leak in heavy rain starts with staying calm and doing the right things in the right order. Protect people first. Contain the water. Keep away from wet electrical hazards. Dry the area fast. Document everything. Then find the real source instead of chasing the drip you can see.
The long-term answer is always a proper inspection and a real repair plan. If your roof is leaking during storms and you want a clear, honest assessment before the damage gets worse, contact RoofEval for a professional inspection and the right next steps for your home.
